Conifer 2.4GHZ Antenna Modifications for Wireless LAN
Andrew Spurrier & John Samin VK1EME If you have all the tools on hand then these modifications will probably only take an afternoon to do.... Tools used: Soldering Iron Hacksaw 11mm spanner Pliers Hammer and Phillips head screwdriver (to remove downcoverter...) Hobby Knife Silicon Glue File (Sandpaper will probably do the same job).
Step 1. The first step involved stripping the antenna to its major components. First undo the two cup head bolts that holds the dish and the nose assmebly together. Step 2. Next remove the locking nut and washer that hold the threaded coaxial (F type) connector in place.
Step 3. Carefully separate (cut) the top of the nose away from the plastic case. Don't be too brutal, every millimeter counts at this frequency! I used a hacksaw, maybe a sharp knife could be used instead? Step 4. Push the coaxial connector up through the plastic nose cone. This took a bit of effort because of the sticky glue used to hold it in place, but a little help from a phillips head screw driver and a hammer persuaded it to come out! Remove the downconverter from the nose cone. Step 5. 
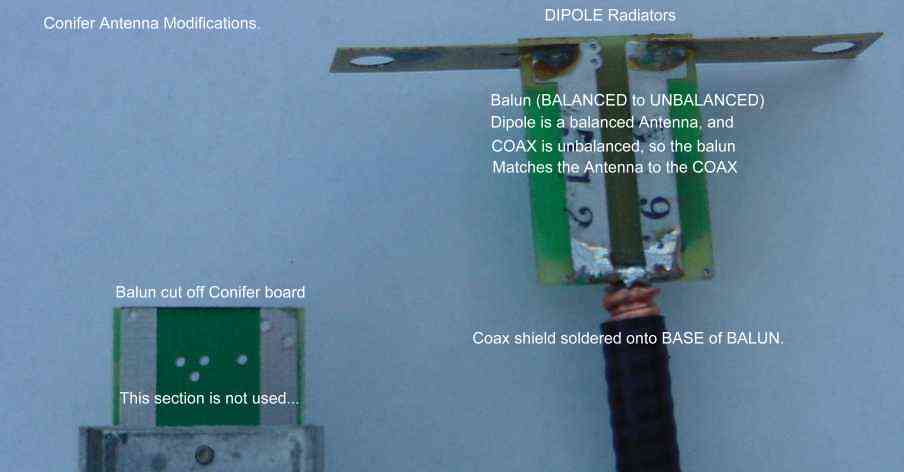
Carefully cut the BALUN assembly away from the downconverter. The BALUN is etched on the PCB, if you follow the connections it appears to be a dead short on one side. This is a half wave stub, the coax shield will be connected to this. The other side (with t he surface mount components) there is a single wide 1/4 wavelength track that connects the final amplifier chip to one side of the DIPOLE antenna. Cut the PCB just above the amplifier chip - See the photos below... Step 6. 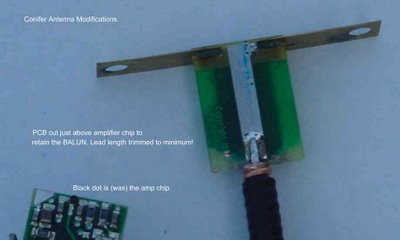
Clean up the PCB cut with a file. Carefully solder the coaxial cable to the balun, the picture shows heliax cable connected to the balun. Here the shield has been soldered to the bottom of the balun. Make sure the coaxial cable tails are kept as short as possible. This will help to maintain efficiency. Here is the other side of the balun. The center wire of the coaxial cable is soldered onto the single track. This track originally connected to the amplifier chip on the downconverter PCB board. Again keep the lead lengths as short as possible.
Step 7. 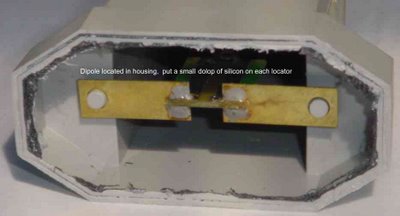
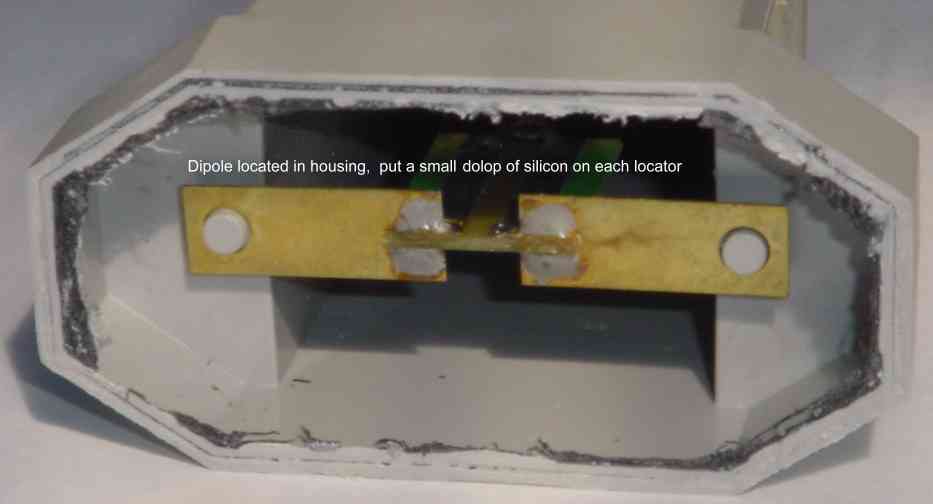
Here is the DIPOLE located back in the nose housing, ready to be glued. Put a small drop of glue on each locator lug to hold the dipole in place. Step 8. 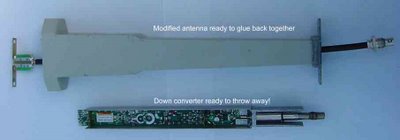
Here is the assembled modified nose cone ready for gluing back together. I've used BNC connectors, they are rated to 11GHZ and have 0.2db insertion loss at 3GHZ. You may want to use N type connectors. Don't use UHF connectors at this frequency. Be very carefull putting the connectors on the cable, a mistake (electrical short) here will be disasterous! Step 9.
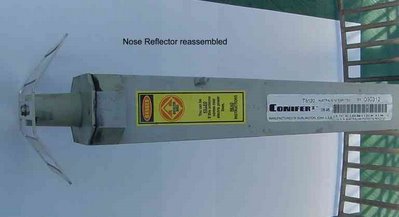
Glue the plastic nose cone and reflector back on the nose housing. Seal off the coaxial cable entrance hole with silicon glue.
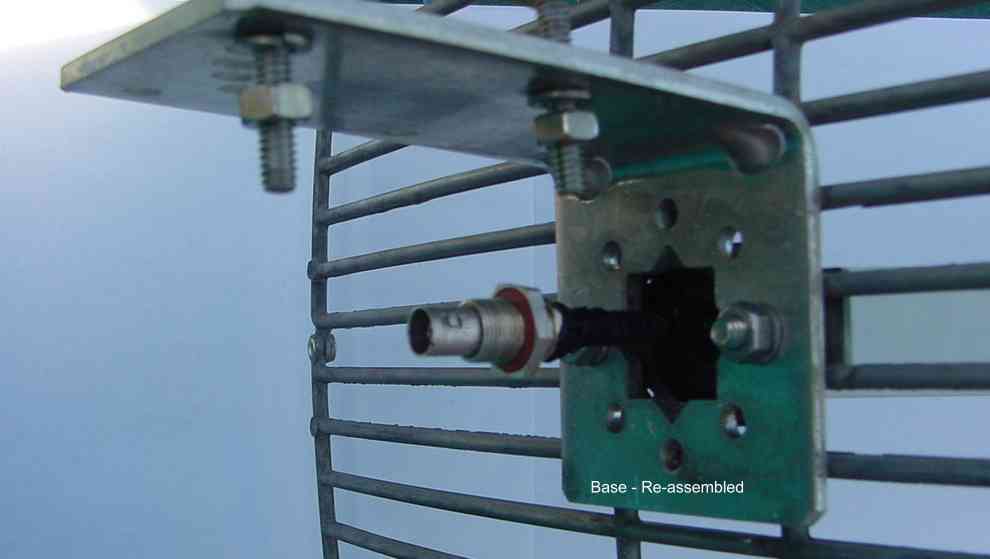
Step 10. 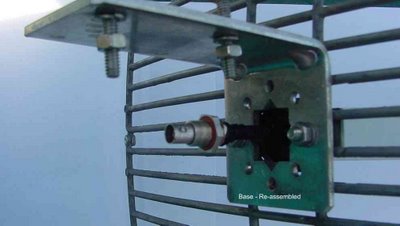
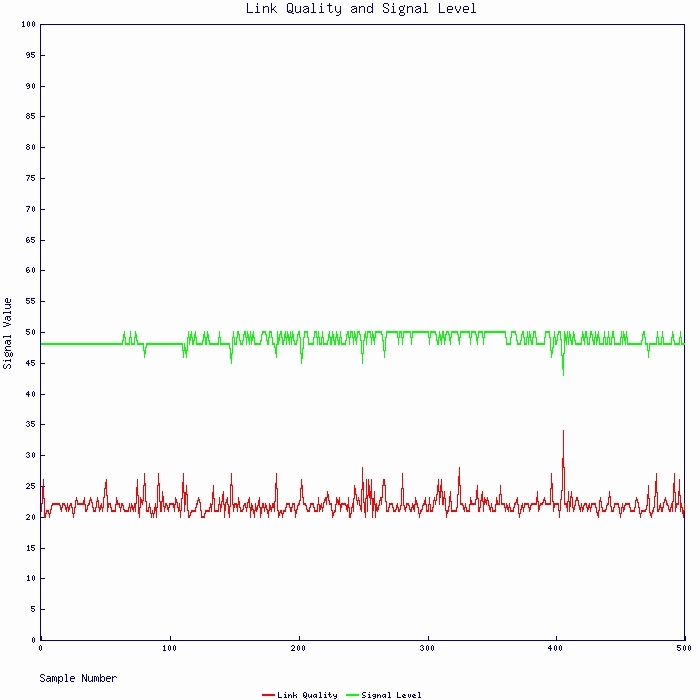
Reassemble the Grid Dish and it's finished! Well at last we have our masts up and we have a permanent 11Mbps link. We have installed Mandrake Linux onto laptops, and use these for the Cisco Wavelan cards. The Laptops run the security and act as gateways to the other computers on our network. Also now that we have seen some heavy rain, we have proved that the link is stable in most weather conditions (only fog to go... ). Signal strength varies from 56% to 48% during the day, and I've seen it as low as 26% during a torrential downpour. Link quality ranges from 92% to 98%. Pretty good results considering we don't have line of sight and are transmitting with 100mW of RF!

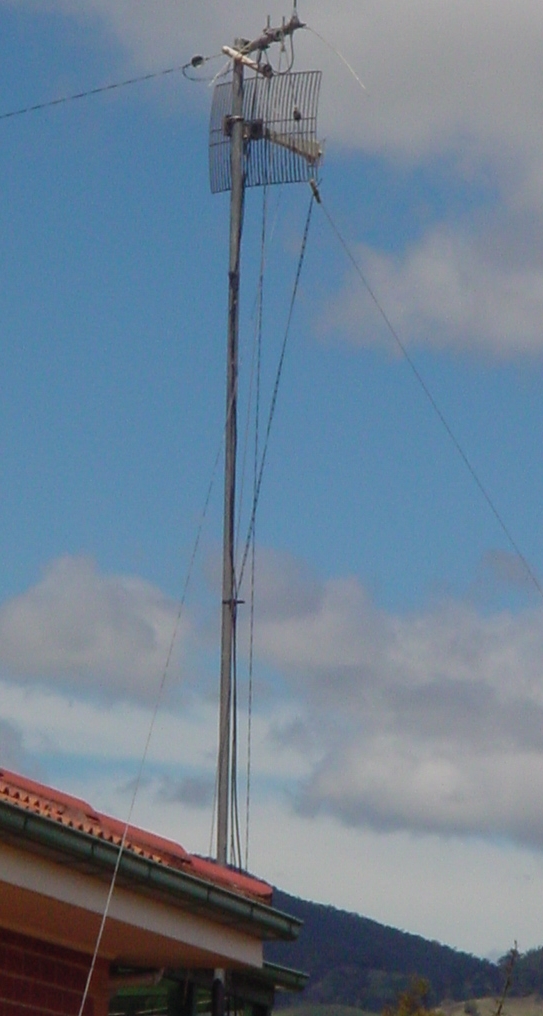
Here's the antenna installation at one end. 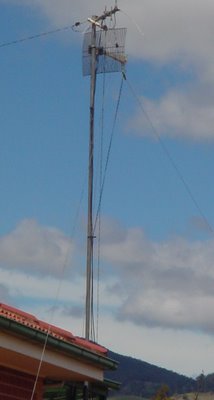
And the other... While this one is in with my HF/VHF antennas, both are well clear of the houses and nearest obsticals.
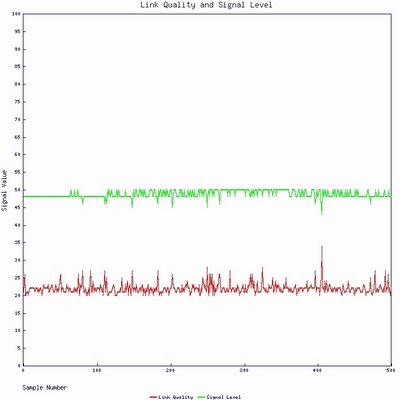
Here is a graph of the signal level of our link from one end, over a 4 hour period. Each sample was taken at 30 second intervals. The page is generated by a perl script, once it's completely finished I'll release the source and post a link to the page.
SOURCE : Andrew Spurrier & John Samin VK1EME |